Sunday, September 10, 2023

Electrical System for "NEW" Ridge Point HS Band & Guard Trailer


Recently I had the privilege to design the electrical system for the Ridge Point Band and Guard trailer. As a long time volunteer of their boosters, I have the incite of the past trailer configuration and have witnessed how other bands have approached the same task. 

Goal for the new trailer:

  • Provide lighting for upper and lower decks

However, I challenged myself to meet these additional goals: 

  • Setup a low-voltage only system to mitigate any potential hazards
  • Provide external lighting for loading and practice
  • Have enough capacity for long weekend competitions or extended usage
  • Include fans to generate some airflow
  • Provide a "dash board" of labeled switches and a battery "gas gauge"  
  • Provide USB charging ports for directors 
  • Provide a safe external "shore power" outlet that could be connected by a traditional 3-prong household style outlet. This could in turn be fed by a generator, a solar charger or even a vehicle's 120v outlet as are available.  
  • Include a battery cutoff switch to mitigate parasitic power drain during the off season and extended periods of storage

Wednesday, May 20, 2020

Mesh - Is it the solution or just more problems?

Today's success story is once again about fixing poor WiFi. 

But today we are going to discuss the misunderstandings of Mesh.


Here's the typical scenario: 

Internet service is installed
ISP provides customer with a nice new WiFI Router!
(Oooo, Ahhh....Shiny!)

Customer connects to WiFi and all seems OK.
Customer moves around their home/business and finds
more and more dead zones and weak signal

Customer starts looking for advice and researching how to get better signal
Customer usually is looking for a cheap and painless quick fix

Customer discovers WiFi Mesh or Extenders
and continues to be disappointed !!


Shown above are
one common WiFi Router/Mesh Pods (left)
and WiFi Extender (right) 
that I find today


So, what's wrong with Mesh? 

Mesh is the latest name for products that try and solve the weak WiFi problem.
People also use names like Extenders and Boosters. 


And here lies the naming deception to all these devices. 

They don't INCREASE signal strength, they only pass along WiFi signals


The intent of extenders or mesh devices is to connect to the base WiFi unit and then pass along that signal to other devices including other mesh units. 


The expression "only as strong as the weakest link" applies to radio signals like WiFi.
If the connection to the base unit is weak,then the whole mesh suffers. 

This is the reason why some people have good mesh experiences, and others are so poor. 

But there is still more to the problem....

Let's remember that WiFi is based on radio signals in the 2.4Ghz and 5Ghz ranges.

A radio source, in this case the WiFi Router and any extender/mesh device,
has some small number of radios for each of those bands.

If those radios are busy communicating with other units, then
there are less channels available for user devices.

This results in bottlenecks and traffic congestion. 
Think of rush hour traffic all trying to exit a single off ramp. 

OK, but how bad is it really? 

I'm glad you asked. 

My recent job began with a home network using the router and mesh pods shown above.
As usual, that router was located in a remote closet.

I began by using a wire and testing the internet speed directly at the router.
(This confirmed there was 1Gbps speed coming into the home) 
Standing next to the router, I used several devices and the best
speed I could read over WiFi was 300Mbps download. 

This is an EXCELLENT baseline and would be ideal if the home saw these speeds. 

However....

I then ran some signal strength and speed tests around the home,
and this is what I found....
Standing directly next to the mesh pod closest to the router, I measured 35Mbps download speed. As I moved away from this pod, the number went down into the low teens. 

The customer also said that when one user was online, it was tolerable.
But when multiple users were online, everyone had connection issues.
(That's the bottleneck problem) 

The result was that the 1Gbps service that is being paid for was not able to be
used by even one device, and multiple devices were worse. 


And given our new need to do more at home, he contacted me. 

So, now what? 

My advice to this customer was to discuss building a WIRED
backbone network with several independent WiFi access points 


The above picture shows some of the things you can do better with a wired network.

All of the devices and AP's (access points) that are wired receive
 the full 1Gbps speed of the network
(or the maximum speed of the service you are paying for)

Other devices like cameras, TV's and NAS have full speed and secure connections.

PLUS...

Each of the AP's have their own set of 4x4 MU-MIMO radios
(This LINK has a good graphic about MU-MIMO)

The AP's can be located where the users are,
and not in a closet somewhere

Many homes built after 2000 have unused phone systems that are Cat5 network cable.
These cables can be re-utilized for networks up to 1 Gbps.

What about older homes or locations where
 there are no pre-existing network wires? 


The short answer is we need to run new wires
Good planning is the key to minimizing this process

Often small openings need to be made in the
walls to make access for drilling
These can be patched and repainted

Adding a wired network backbone is an investment for
better networks today and they add value in the future.

Businesses are often easier due to drop ceilings

New home construction is ideal because you can plan for maximum flexibility!

How much will all this cost? 

This is a very tricky question to answer because every home or business
is different and people have different needs.

That is why I offer a free consultation visit followed by a custom proposal.
This allows me to see first hand YOUR needs.

For reference (and full transparency), the photo below is a basic install with 3 AP's.
The hardware is roughly $1200 and then my labor costs added to that.

The devices shown come from the Ubiquiti Unifi line.
I like these because they give you "Enterprise Grade" hardware and management
 software without all the extra costs for subscriptions and licensing.  

Outcome

The customer is very happy with their new network - they
 are finally using all the speed that is coming into their home!  
As part of my ongoing service, we can continue to fine tune any future issues as they arise. 
Additionally, I can continue to add value by making sure firmware updates stay current through remote access. 

Contact Me! 

Use my convenience WEB FORM to contact me to discuss your upgrade!
Or email me >> rob@blomstrom.tech

If you are building new, let's build a plan right now so I can come in before the walls are up! 


Thursday, January 16, 2020

This is how you fix home WiFi (turning it up to "11")

Today I want to share with you how I fixed the home WiFi blues of a neighbor & friend. 

To begin...

They built their home 15 years ago and have the typical useless wire closet that the builders love to charge you to install. 

This one was no different. 

Added to that, the local internet provider did their usual "WiFi router in a closet" trick.

 As seen below, the wireless router/modem is in this upstairs closet and basically as ineffective as possible in providing a decent WiFi signal to anywhere but the room it is in. 

The downstairs and the back patio have next to no signal. 

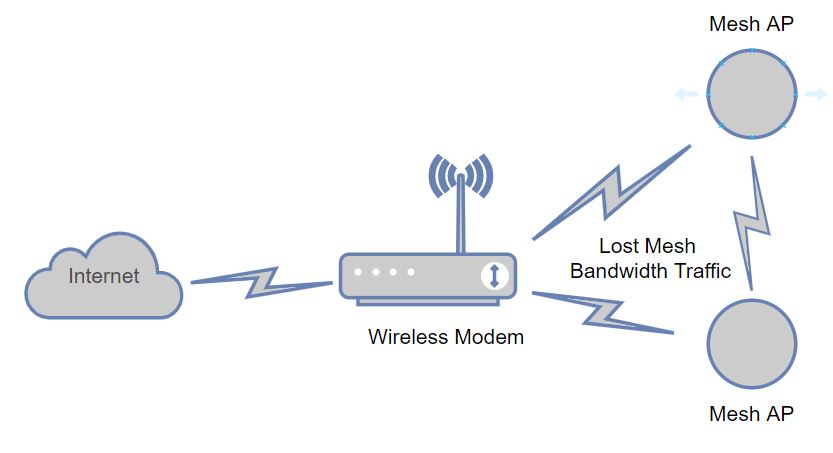
A WiFi extender was tried, but failed to meet the need of streaming video on two TV's. 

BEFORE

Thankfully, this closet is located on the second floor and access to the attic
is a key benefit for adding some major improvements. 

The goals were simple.
  • Get solid WiFi coverage in the house and back patio
  • Add two new outlets for wired connections in the upstairs game & guest rooms. 


There were some secondary goals as well. 
  • Add a wired connection to the garage & add an AP there
  • Add a home NAS (network attached storage) to create a home cloud. 
  • Create separate 2G & 5G network names to better manage devices
  • Create a guest login for the WiFi

How do we get there? 

First, I went to work pulling some new cables.

I needed to run two external Cat6 cables - one to the patio and one to the garage.
Then I ran inside Cat5e cables (to match existing cables in house) to feed the gameroom and the AP that would be installed in the upstairs hallway. 

In the interest of full transparency, pulling wires in an existing home means opening access holes to drill thru ceiling headers. 


Next, I terminated the ends of the cables and tested them. 

Once we had all the cables in place, I could move on to installing the AP's (Access Points)
For this job, I used two models. 
Click the links for more details.
Both of these are latest generation of 2G/5G 4x4 MU-MIMO  technology.

These units receive both power and data from a POE switch

And to bring it all together, I disabled the ISP's WiFi router (bridge mode) and provided a dedicated gateway that complements the AP's and provides router/firewall functions. 

And to ensure these devices are protected from our crazy power, I made sure they are powered by a UPS. 

Never rely on a power strip or extension cord to protect your hardware! 

Here's a view of the upgraded closet with the hardware above:
Some additional tweaks are being discussed to decide if we 
notch the box to allow clean flow of network cables. 

AFTER

The AP's that were mentioned were located in 4 locations:

Garage & Upstairs Hallway


Kitchen & Patio


In this case, the NAS device by Qnap is also running the Unifi controller software. 
This software is free and manages the network just like the big name enterprise systems.

Using an app on my phone, I can monitor the network
or the homeowner can log into a full dashboard at home.  

Below is a screenshot of the devices cited above:


Outcome

There was great success of the goals of building a better network. 
As part of my ongoing service, we can continue to fine tune any future issues as they arise. 
Additionally, I can continue to add value by making sure firmware updates stay current.  


Contact Me! 

Use my convenience WEB FORM to contact me to discuss your upgrade!
Or email me >> rob@blomstrom.tech

If you are building new, let's build a plan right now so I can come in before the walls are up! 


Thursday, July 11, 2019

New Home Network Design and Install


A friend of mine from church came to me with the desire to have his new house have a great network. His family was having a house built which meant that we had a fresh canvas to work with. 

So the first advice I gave him was to have the builder wire all the rooms he may possibly want to connect to a network in the future and also include overhead wires in boxes for access points and future camera locations. These wires need to go to a common location. 

Those locations included all the bedrooms, behind planned TV locations, the gameroom, office, back porch, etc...

Well, that more or less happened. On the plus side, all the desired wiring got routed and made its way to a "common location". Sadly, the builder yielded the usual useless 3 inch deep wall box. This box is intended for simple telephone and cable TV distribution - not a full blown Ethernet network! And worse, their idea of a "common location" is a child's upstairs bedroom closet. Oh yeah, that's a great idea! 


In this box, you will note several things. 
  • There are (15) BLUE Cat-6 Ethernet data lines. 
  • There are (6) RED Ethernet camera lines
  • There are also (6) BLACK useless analog camera lines

In addition
  • There are about (12) WHITE Cat-5 Ethernet lines being plugged into a splitter box presumably for old fashion POTS telephones
  • About (10) BLACK & WHITE coaxial lines for TV plugged into a splitter that is just hanging there as well as those white coaxial lines on the left that are not terminated. 

WHAT A MESS !!

So my plan was to pull as much of those lines out of this box and instead route it to a shelf area on the wall above this box. There I would organize a small 19 inch rack and some network components. 


Above is the cleaned out box. All of the Ethernet lines that were relevant have been removed. The coaxial splitter/amplifier was secured to the box, and its power brick was now plugged into the UPS (Uninterruptible Power Supply) so the cable modem input would remain on if the power went out. 
This closet can now be closed, locked and ignored in this closet location. 


Seen above is a small 19 inch rack chosen to fit in the shelf space above the cleaned out box in the closet. Out of the view of this photo is the cable modem and the UPS.

All of those BLUE Cat-6 lines and some of those Cat-5 lines
are connected to the back of the patch panel.  

Items shown are as follows:
The switch shown is a Ubiquiti Unifi 24-port 250W POE+ 
The gateway and firewall that links the cable modem to the home network is a Ubiquiti Unifi USG
The Ubiquiti CloudKey G2+ is both a network controller and will serve as an video recorder for the future cameras. 

The Access Points  that were chosen:
Ubiquiti Unifi NanoHD for inside the house
Ubiquiti Unifi AP-PRO for outside porch

In the future, the cameras will come from the Ubiquiti family such as the G3-Pro or -Dome

The network is working great, my friends family is happy, and the system has room to grow! 

My friend or I can monitor the network controller from anywhere using the free software apps from Ubiquiti. And when software needs updating, I can do that remotely as well!